Project development
In this page, I will:
- Briefly describe my team chemical device
- Show how the team planned, allocated the tasks, and executed the project
- Document the entire design and build process of the chemical device and include videos, pictures, and screen captures of the processes
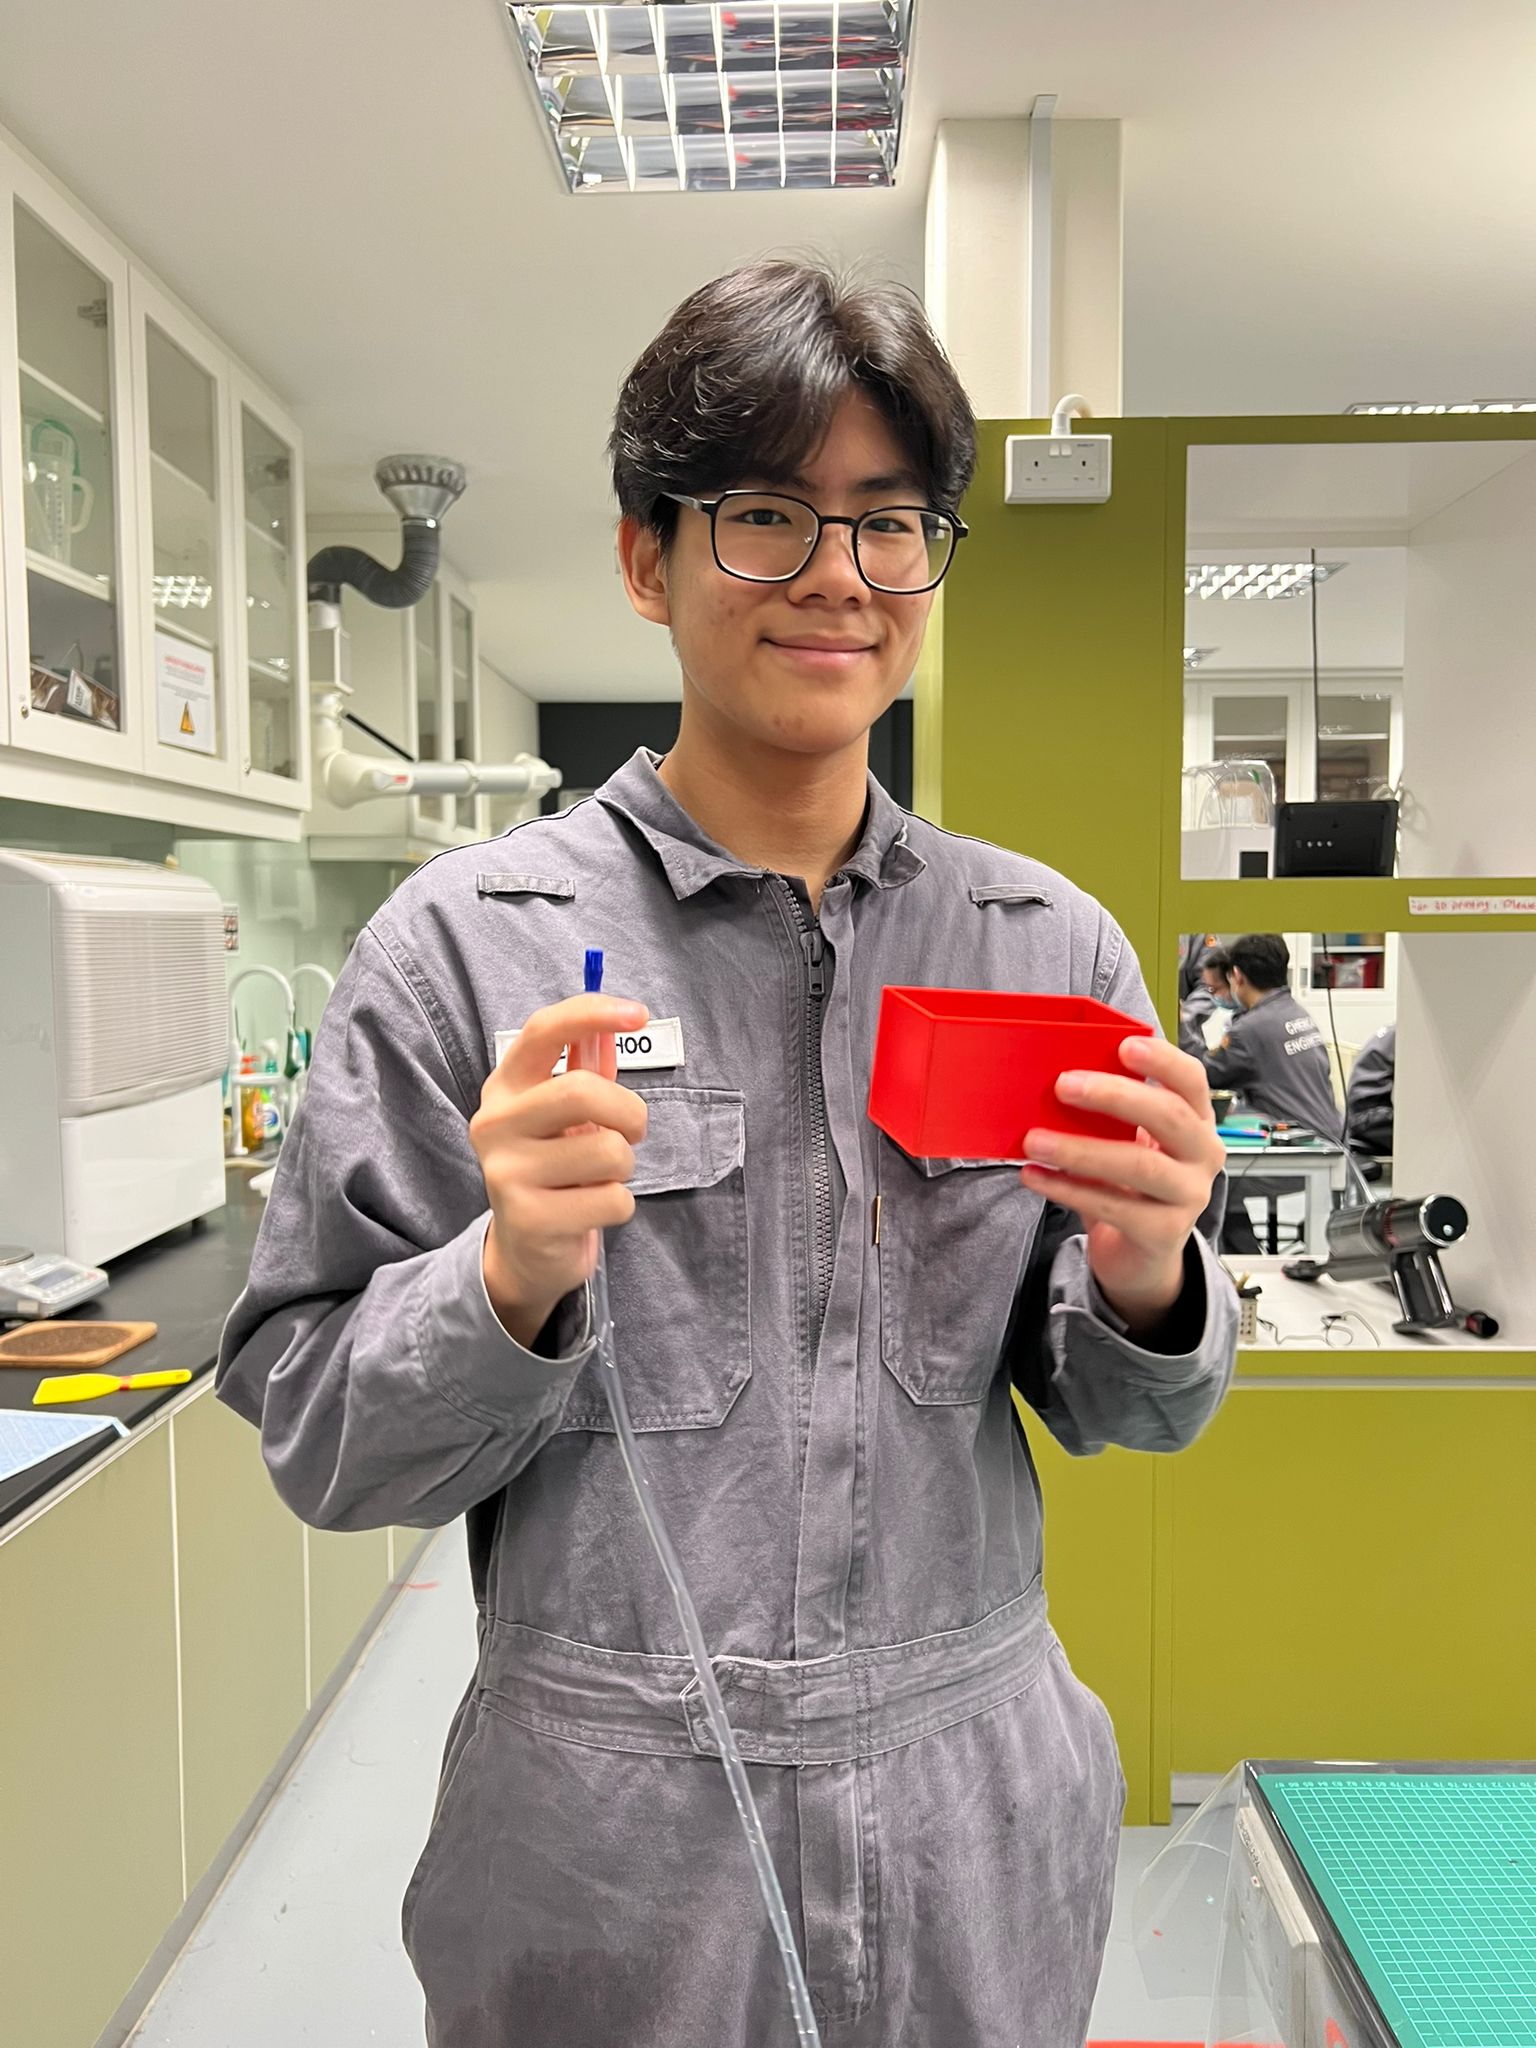
- Include “Hero shot” of every milestone of the processes, example the part A that was 3D printed, part B that was laser-cut, electronics components moved/worked according to the program. Hero-shot is taken with the person-in-charge holding/working/making the parts
- Include the name of the person who was in-charge of every part of the project.
- Document my individual contribution to this project
- Provide the link to the page of the blog of my teammates
- Describe problems encountered and how the team solved them
- Include all the project design files as downloadable files
- Embed the final prototype design file, i.e., the final fusion360 design file showing the entire prototype
- Type my Learning reflection on the overall project development
1. Our team Chemical Device
· In this section, I will briefly describe my team chemical device.
·
What it is. What problems will
the chemical device solve?
· Below is the hand sketch of the chemical device.
My team's chemical device is an Automated Door Handle Sanitiser
Background:
With the rise of Covid-19 cases in Singapore, Covid-19 patients are often going in and out of the hospitals. Covid-19 are transmitted through high touch surfaces and door handles are very contaminated(not just with viruses as well as bacteria). Based on a study, high-touch surfaces have 14 different bacteria colonies on one door handlle and each colonies contains more than a million bacteria. Covid-19 is also transmitted on high touch surfaces hence it is important to keep our door handle sanitised always.
What is this chemical device?
Similar to a automated hand sanitiser, a sensor will detect a hand after opening a door and disinfect the door handle before the next person uses.
What will the chemical device solve?
This device would solve the spreading of contamination. Since the door handle is a high touch surface, having this device will eliminate the contaminants as fast as possible keeping it cleaner for the next user lowering the spread of diseases or viruses. Such places that this device can be installed at would be the hospital due to the high volume of sick patients visiting everyday.
Here is a quick sketch of our product:


Team Planning, allocation,
and execution
·
In this section, I will list
down my team member's name and their respective roles (CEO, CFO, COO, CSO)
·
I will show the finalized BOM (BILL OF MATERIALS) table.
·
I will show the finalized Gantt chart (planned and actual) and the tasks allocation for each
team member.
Here is my team members and their respective roles:


- Jasmine and Weng Yan will be in charge of CAD Fusion 360 (outer case, tank and top cover).
- I (Glenn) will help to 3D print the tank while Jasmine and Weng Yan will laser cut the outer case, interface and top cover.
- Tristan and Hariz is in charge of Arduino Programming for the spray.
- Hariz is also in charge of 3D printing the nozzle for the spray while I provide assistance.
- The team will then assemble and prototype testing together.


Click here to see a clearer view of our Gantt Chart.
Design and Build Process
In this section, I will provide documentation of the design and
build process.
Part 1. Design of cardboard prototype (done by everyone).
- Firstly we designed and sketch out the cardboard prototype,
- Next we will cut out the sketched dimensions of the bottom half of the device and hotglue to make the outer casing,
- Next, we will cut out the sketched dimensions of the tank and hotglue it together to make the tank,
- Next, we will cut out the sketched dimensions of the top half of the device and hotglue to make the top casing,
- Next, we would insert a straw to act as a tube that will deliver the alochol,
- Lastly, we would test out the prototype to see if the Arduino kit fits into it,


Part 2. Design of Outer box and Tank CAD (done by Jasmine)
Click here to see more: https://cp5070-2022-2b04-group1-jasmine-chan.blogspot.com/
Part 3. Design of top cover CAD (done by Weng Yan)
Click here to see more: https://cp5070-2022-2b04-group1-how-weng-yan.blogspot.com/
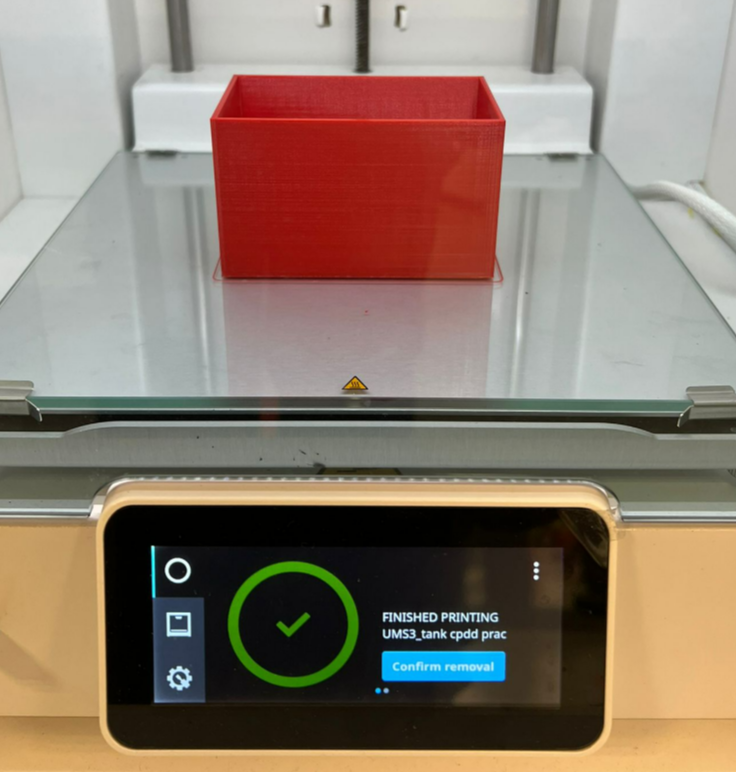
Part 4. 3D Printing of Tank and Nozzle (done by Me, Glenn)


- Infill density : 3%
- Infill pattern : Tri-Hexagon
- Support : everywhere

- Infill density : 100%
- Infill pattern : Tri-Hexagon
- Support : none


STEP 4) Save the settings to the removable to the SD card


Part 5. Design of Nozzle (done by Hariz)
Click here to see more: https://cp5070-2022-2b04-mohammad-hariz.blogspot.com/
Part 6. Programming of infrared sensor, LED, servo and pump (done by Tristan)
Click here to see more: https://cp5070-2022-2b04-group1-tristan.blogspot.com/
Part 7. Assembly(done by everyone)
This is outside layer of the bottom half of the device:


This is the cover of the chemical device which would be placed last after putting in the arduino board and LEDs,

This is us glueing the acrylic pieces together,

Problems and solutions
In this section I will describe the problems encountered in the
design and build process and how the team solved them.
·
Problem 1 and how we solved it


·
Problem 2 and how we solved it
·
Problem 3 and how we solved it
·
Problem 4 and how we solved it

Project Design Files as
downloadable files
In this section, I will provide all the design files (Fusion360 files, .dxf files, .stl files, arduino programs files) as downloadable files.
Below is my Learning
Reflection on the overall Project Development.
This project was a great experience for me as I was able to see our idea hatched into an actual product, it gives my group and I, a great sense of achievement and pride. I am really grateful for my team members and I believe we have all grown really close after completing the project together. I've learnt that teamwork was really important and keeping good communication throughout is essential.

Even though there was small hiccups throughout the project such as communication breakdown which caused us to be waiting for each other for 2 hours for nothing. We eventually managed to clear the air and got back down to work again. "Work alone to go fast, work together to go far", this quote applies to our group very much. Initially we tried working different components alone and we managed to complete it fast however there were many errors and many things were not going our way however when we sat down together and discussed about the issue, we managed to solve the issue.
Overall, this few months working together was memorable, from staying back and discussing to having many tiny mini group learning journey to Sim Lim Square to get components. It has been a pleasure working with this few people. Enjoy this lil clip of us fooling ard:
No comments:
Post a Comment